Building and installing the AGX Dynamics plugin (Windows)
The AGX Dynamics plugin is included in the Choreonoid source code.
Set the following CMake options to ON before building Choreonoid in order to be able to carry out the build.
- BUILD_AGX_DYNAMICS_PLUGIN : AGXDynamicsPlugin - the AGX Dynamics simulation plugin
- BUILD_AGX_BODYEXTENSION_PLUGIN : AGXBodyExtensionPlugin - plugin for dedicated models (such as wire, etc.)
Below, we will explain the installation process in detail.
Launch CMake.
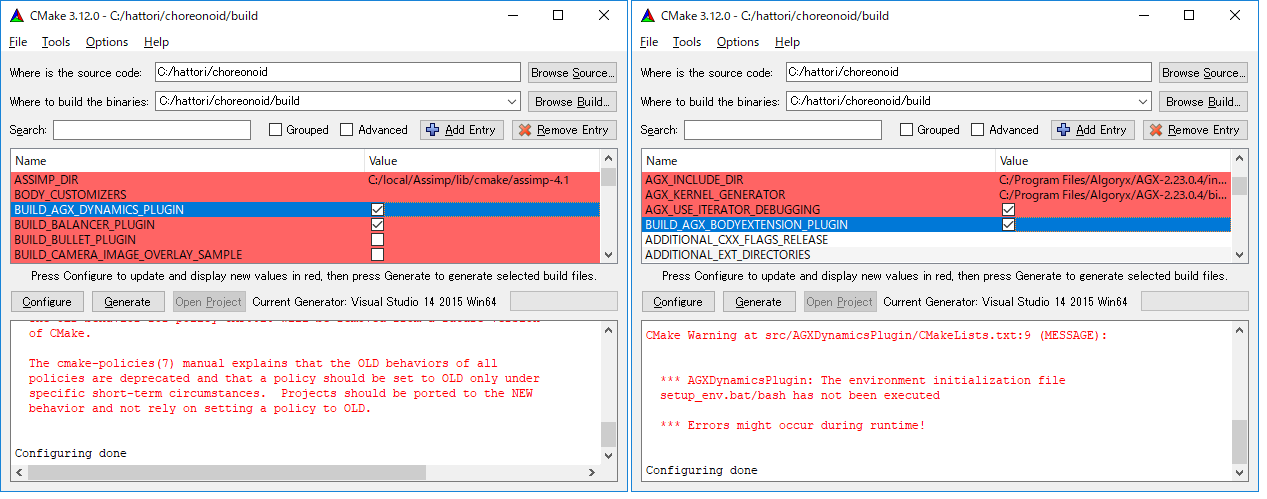
Check the box for BUILD_AGX_DYNAMICS_PLUGIN and click Configure. The AGX library will be automatically detected.
If it is not detected, set AGX_DIR to the installation location directory.
Check the box for BUILD_AGX_BODYEXTENSION_PLUGIN and click Configure again.
As shown in the screenshot, the message “*** Errors might occur during runtime!” Is displayed, but if you have set the Environment variable settings, you can ignore this.
Note
Since AGXBodyExtensionPlugin is dependent on AGXDynamicsPlugin, it will not be displayed by ccmake unless BUILD_AGX_DYNAMICS_PLUGIN is ON. Set BUILD_AGX_DYNAMICS_PLUGIN to ON and click Configure.
Click Generate to create the solution file. Then, build and install in the same way as in the section on Launching Visual Studio and importing solutions .